Onboarding / Microsoft Word
Set up Source Assist in Word.
Install the Aescend Word add-in, then add it from the shared add-in catalog.
01
Run the Windows installer
Download the installer. Close Microsoft Word completely before starting the installation.
Download installer
- Run
AescendWordAddinInstaller.exe.
- Accept the administrator prompt.
- Finish the installer and restart Word.
02
Add the add-in in Word
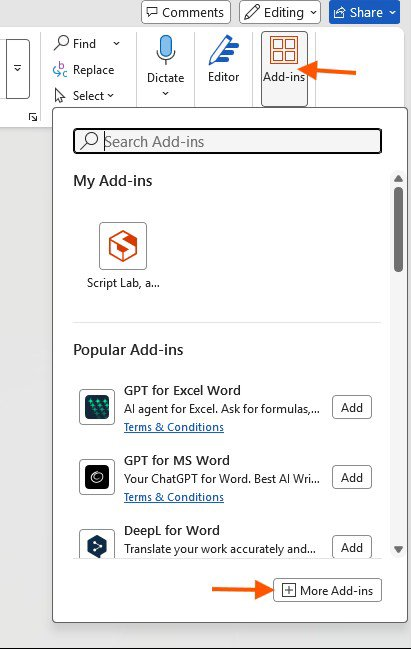
Open Word and select the add-ins area in the ribbon.
- Go to
Insert -> Add-ins -> My Add-ins.
- Click
More Add-ins.
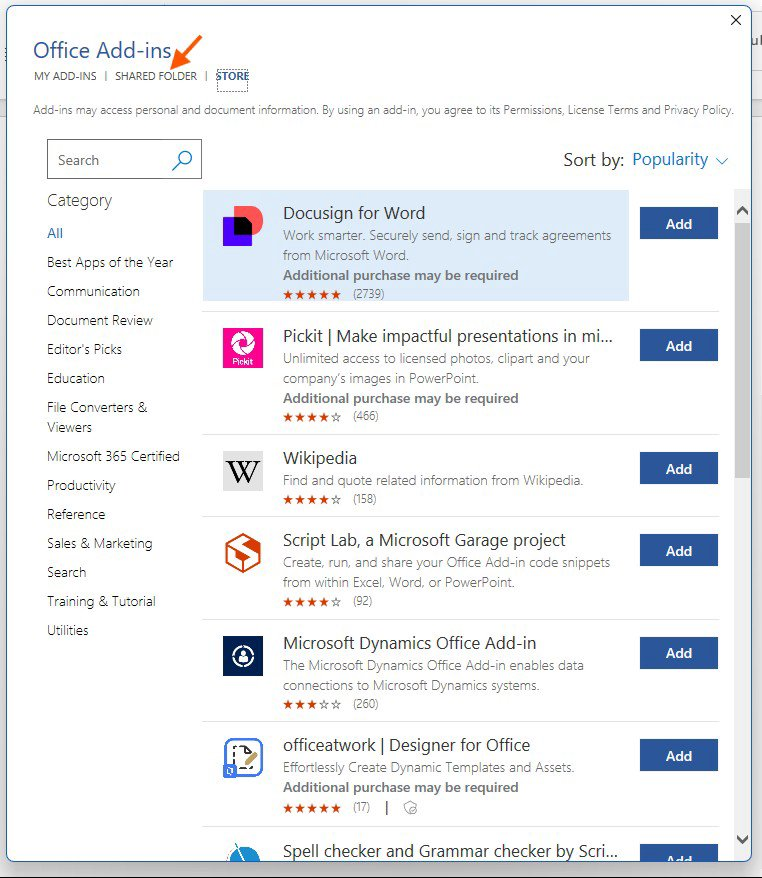
- In the Office Add-ins window, open the
Shared Folder tab.
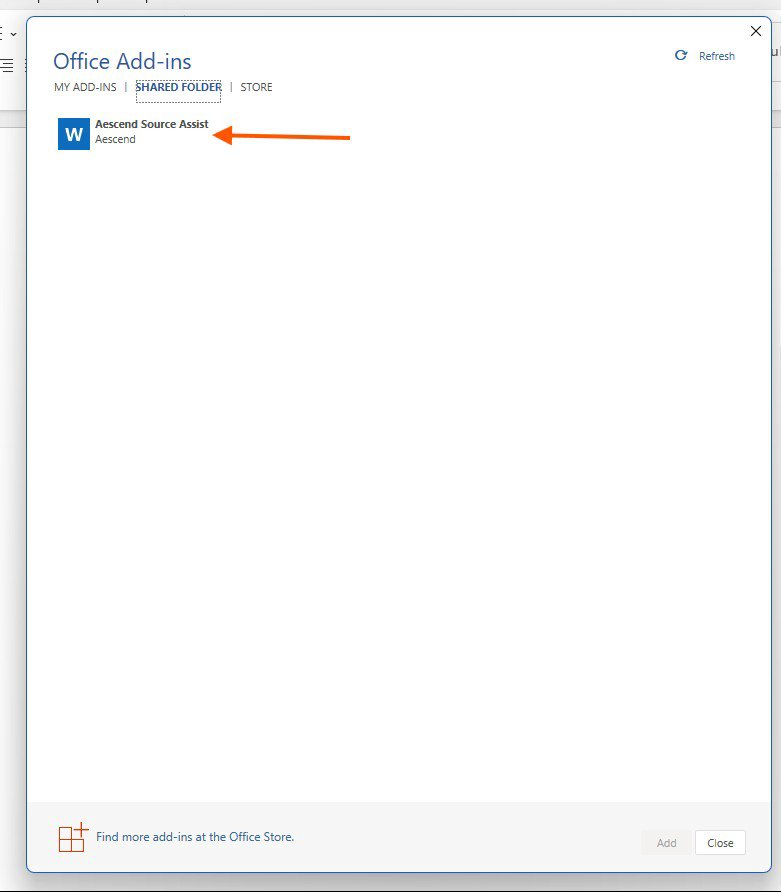
- Select
Aescend Source Assist, then click Add.
The Source Assist button should now appear in the Word ribbon.
03
Verify the network share
If the add-in does not appear, verify that the shared folder exists.
- Open the Start menu and search for
Computer Management.
- Open
System Tools -> Shared Folders -> Shares.
- Look for
AescendWordAddin.
The expected local path is:
C:\ProgramData\Aescend\WordAddin
Test the share in File Explorer
You can also open the share directly. Replace <COMPUTERNAME> with your computer's name.
\\<COMPUTERNAME>\AescendWordAddin
The share must contain the file manifest.xml.
Open the installation guide as a PDF